NBD Lite #3: Easy Classification Model Deployment with FastAPI and Docker
The best model is the one that get deployed
I am often asked by many data analysts and data scientists—How can you deploy your machine learning model?🤔
Machine learning deployment is usually not taught in a formal data science education, so you must learn it yourself.
Well, I want to give you some pointers on how you can quickly deploy your model in under 3 minutes (of course, the whole process takes longer than that).
Here is the visual representation of how we can create a simple pipeline for model deployment with FastAPI and Docker.
Well, it seems simple, right? Don’t worry if you find it hard; we will go through it step-by-step.
All the scripts used in this post are hosted in my GitHub repository.
Step 1: Prepare the Environment and Project Structure
Let’s prepare the environment for our project. You can use any of your favorite IDEs, but I prefer Visual Studio Code.
In the terminal, create a virtual environment with the following code.
python -m venv classifier_projectYou can change the virtual environment to your preferred name.
A virtual environment is a best practice in any development project, so ensure you always have one when you initiate a new project.
Go to the folder selection, try to find the \Scripts\activate , and copy them to your terminal to activate them.
In parallel, you can also create the project structure
classification-api/
│
├── app/
│   ├── main.py                 # FastAPI application script
│   ├── model.py                # Model training and saving script
│   ├── utils.py                # Collection of the utility functions
│   ├── requirements.txt        # Python dependencies
│   └── Dockerfile              # Docker configuration
└── train_model.py              # Script for initial model training
Don’t forget to install the Docker Desktop, as we would use that.
Step 2: Train the Model
We would skip many parts of the process, such as feature selection and preprocessing, as the aim is not to have the best model.
This is an initial model training. We would save the code in train_model.py.
We would do the following:
Load the Iris dataset.
Optionally, we would split the dataset into a train and test dataset.
Lastly, we train a decision tree model from it and save the trained model.
Step 3: Prepare Model Retraining Script
Next, we would fill the model.py script with the model retraining logic.
In this step we would provide the logic where the model would be replaced the model if the performance is better than certain treshold.
When we set up the retraining process, we should adjust the training dataset and the metrics threshold. However, this tutorial would use the previous dataset and hard-code the metric threshold.
Adjust the data, metric, and threshold as you require.
Step 4: Prepare Utility Functions
To help the whole project process, we would set the utils.py script as a helper function.
For this time, we would only prepare the monitoring function to log the model evaluation using the logging package.
The log result can be seen later when we use Docker during retraining.
Step 5: Prepare the FastAPI Application
We would come into the important part where we would develop the FastAPI application.
In this application, we would set the model as an endpoint to pass the data and acquire the prediction result.
For the production, we would run the function as a background task as model prediction could take some time and might affect performance.
We would also set an endpoint for the retraining process when you need it. We will log all the processes as well.
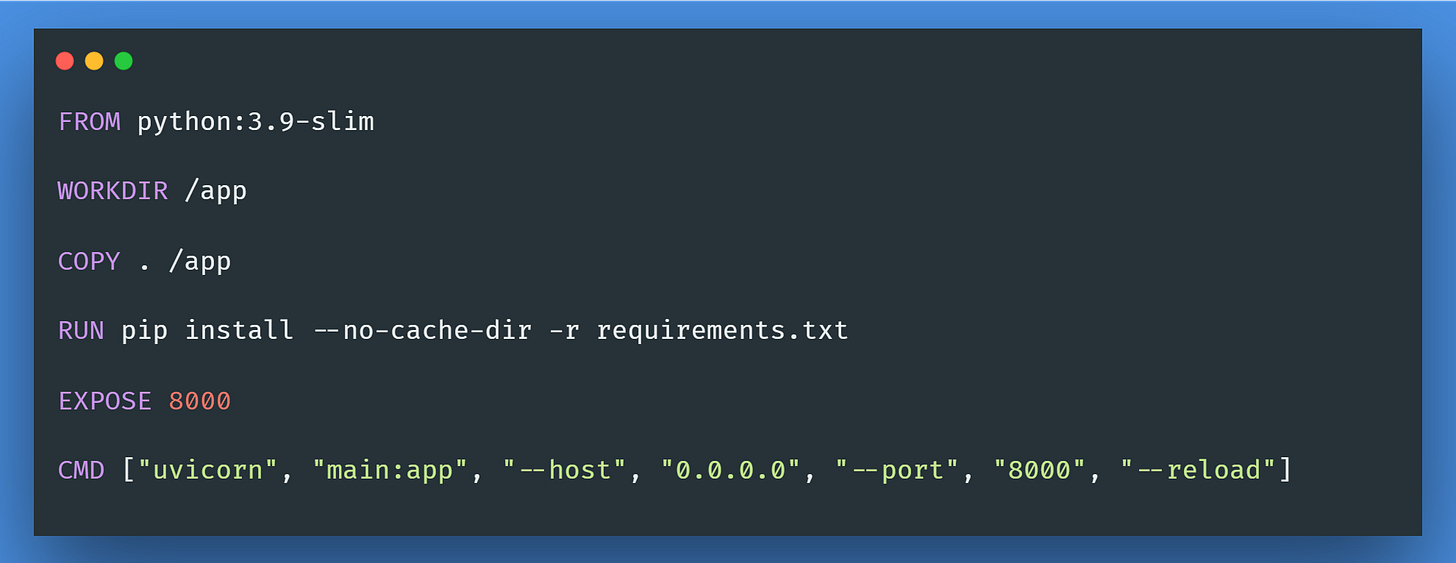
Step 6: Prepare the Docker Setup
Once the application script is ready, we will prepare dockerfile to containerize the application, allowing us to access the endpoint.
Step 7: Prepare the requirements.txt
Add the following packages into the requirements.txt for the project.
fastapi
uvicorn
scikit-learn
joblib
Step 8: Building and Running the Docker Container
You could run them to get the model if you haven't trained your model.
python train_model.pyThen, ensure that your Docker Desktop is installed and moved to the folder containing your dockerfile.
Execute the following code in your terminal to build the Docker image.
docker build -t fastapi-classifier .You can change the image name to your preferred name.
Then, we would start containerizing the Docker image to your Docker desktop to host the application.
docker run -d -p 8000:8000 fastapi-classifierThe application is ready now!🤩
Step 9: Test the API
With our application ready, you could test the API you have now.
Using the cURL, we can have the POST request for the predict endpoint.
curl -X POST "http://127.0.0.1:8000/predict/" \
-H "Content-Type: application/json" \
-d '{"data": [5.1, 3.5, 1.4, 0.2]}'
If you need the model retraining, we can send the GET request to the retrain endpoint.
curl -X GET "http://127.0.0.1:8000/retrain/"If you see results similar to the above, you successfully develop and test the API.
If you want to check the log like above, you can run it using the following code:
docker logs <container-id>Congratulation! You successfully deploy your model.
The next step is to ensure the application runs properly and prepare all relevant resources for your project.
That’s all for today! I hope you learn how to deploy your classification model.
What part of the deployment process do you want to learn further? Discuss them in the comment.
👇👇👇
FREE Material for your ML Deployment Learning❤️
👉End-to-End Machine Learning Project Development: Spam Classifier


